
Enjo Webchat
This guide will help you set up and deploy the Enjo AI agent to your websites.
Setup Enjo AI agent for AI answering
Setup Enjo AI agent for ticketing
Deploy the AI agent to the website
Customize the webchat
Test it on your website
Setup Enjo AI Agent for AI answering:
Step 1: Log in to the Enjo Dashboard :::
Step 2: Go to the respective AI agent
Step 3: Navigate to the 'Knowledge' tab and add relevant knowledge sources. Please see for available KB sources and how to add them.
Setup Enjo AI agent for ticketing
Step 1: Navigate to the 'Ticketing' tab to connect your ticketing system, configure request types, and request creation behavior.
Deploy the AI agent to the website
Step 1: Go to the 'Channels' tab --> Connect Channels --> And choose "Website".
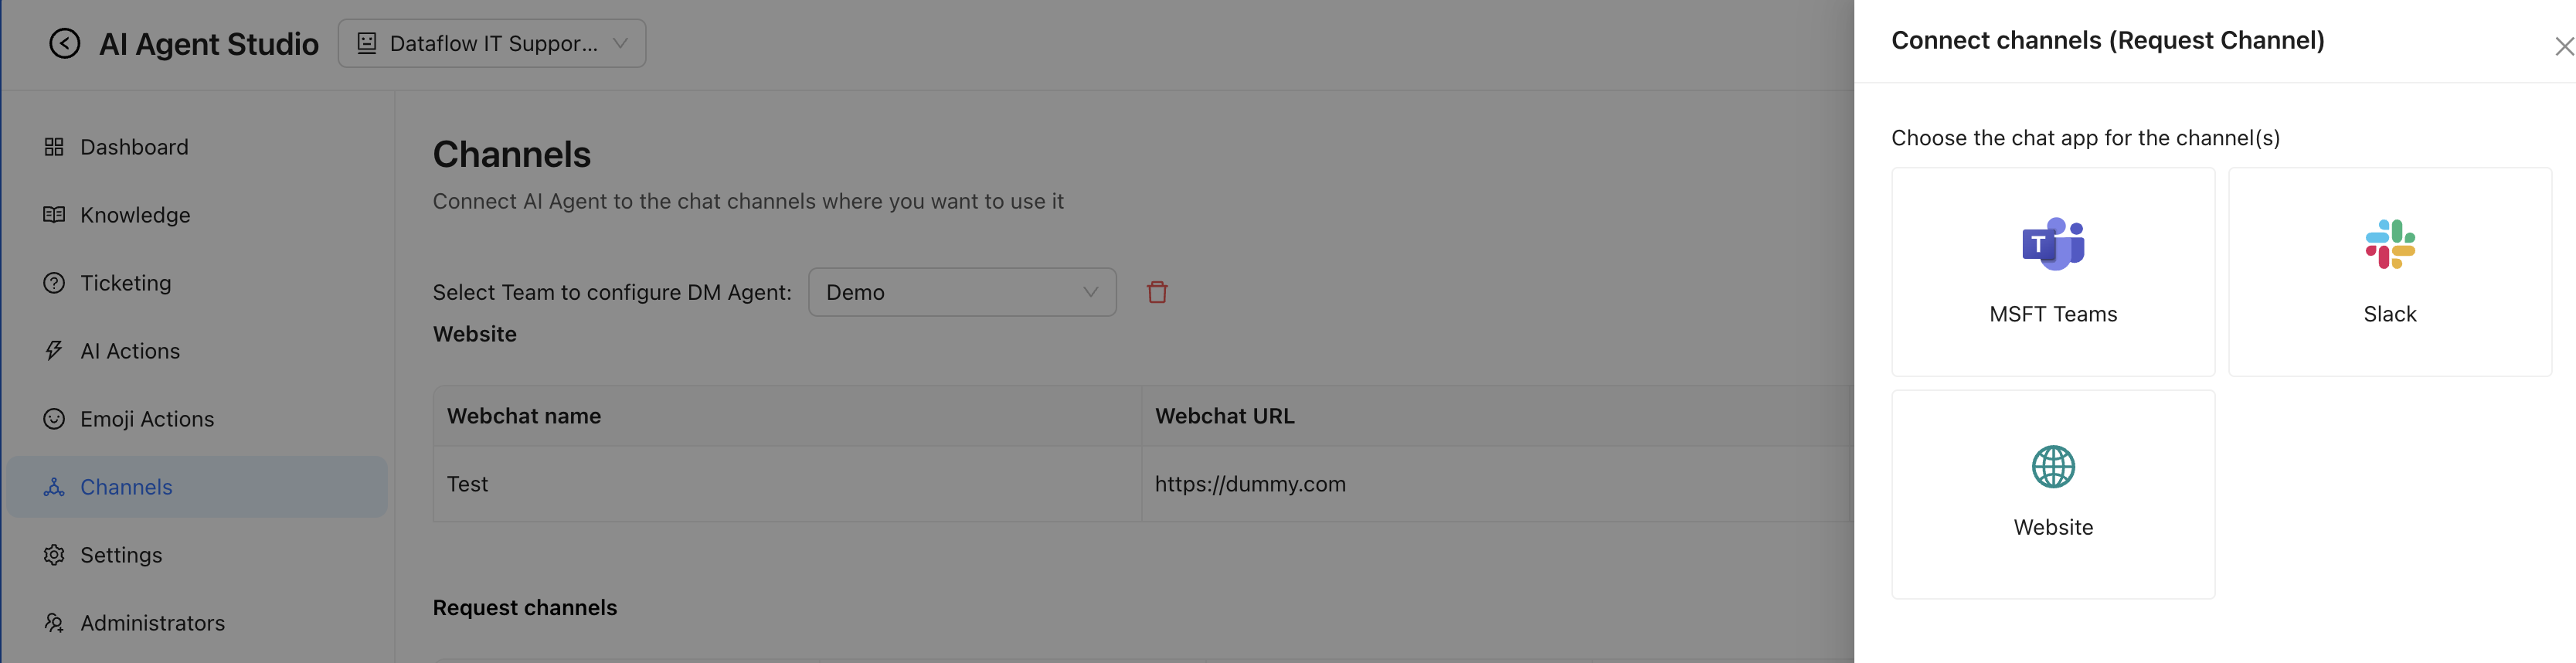
Step 2: Enter the 'Website Name' and 'Website URL' and click the "Add Website" button
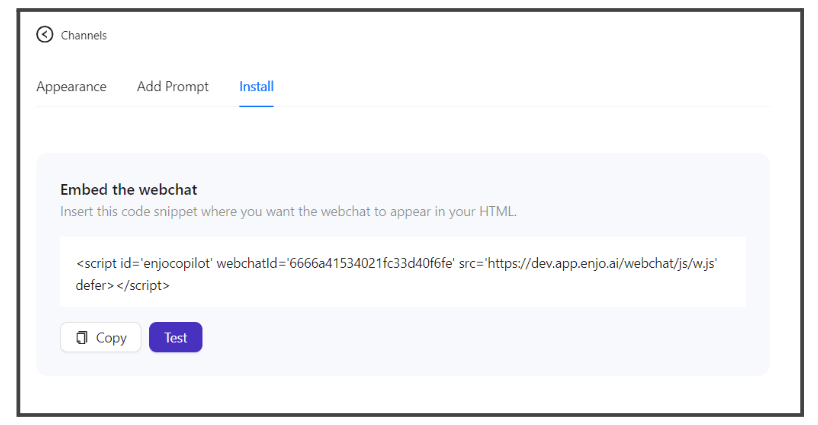
Step 3: You will land on the web chat configuration page. Navigate to the 'Install' Tab to copy the HTML snippet and add it to your website.
Customize the webchat
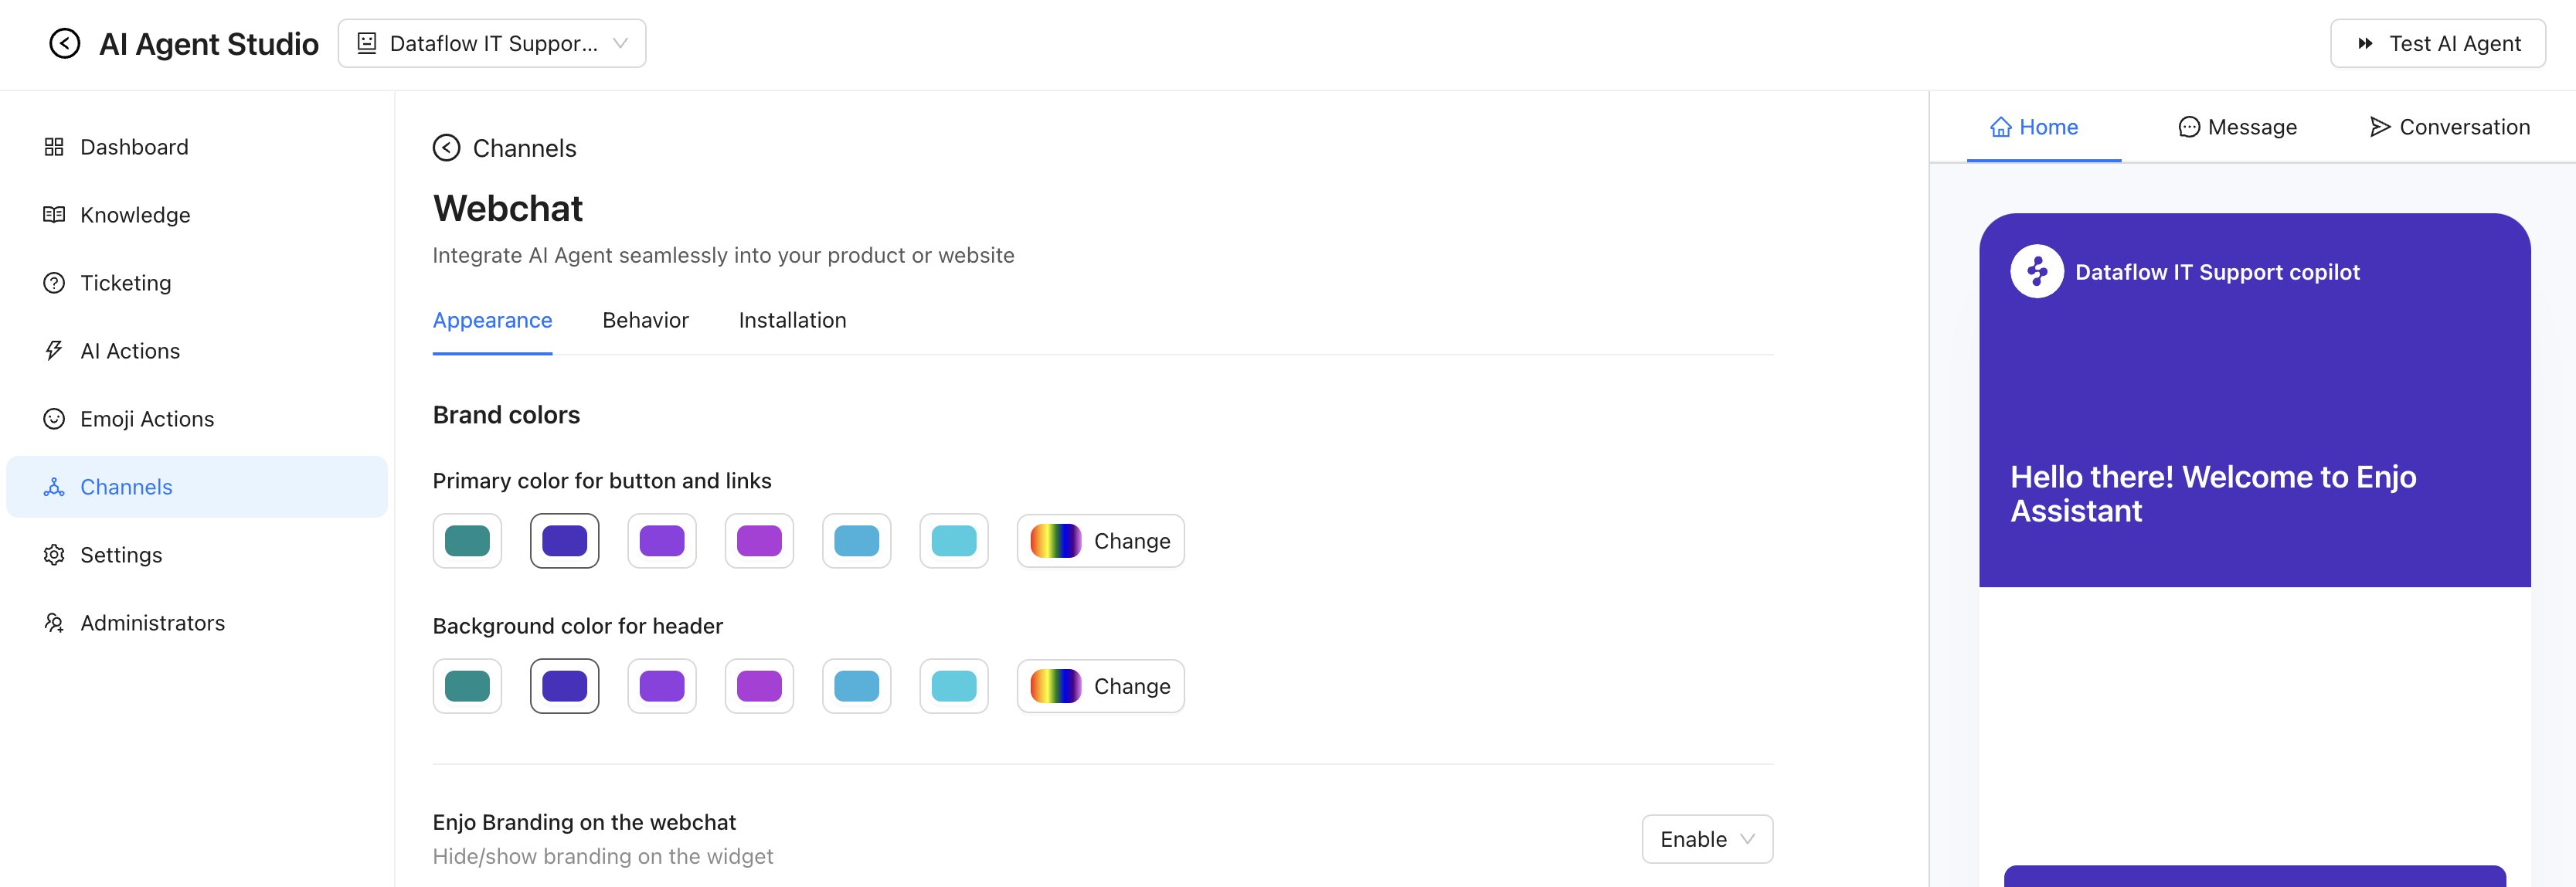
Step 1: Go to the 'Appearance' tab to customize the webchat appearance including the color, branding, spacing, and more.
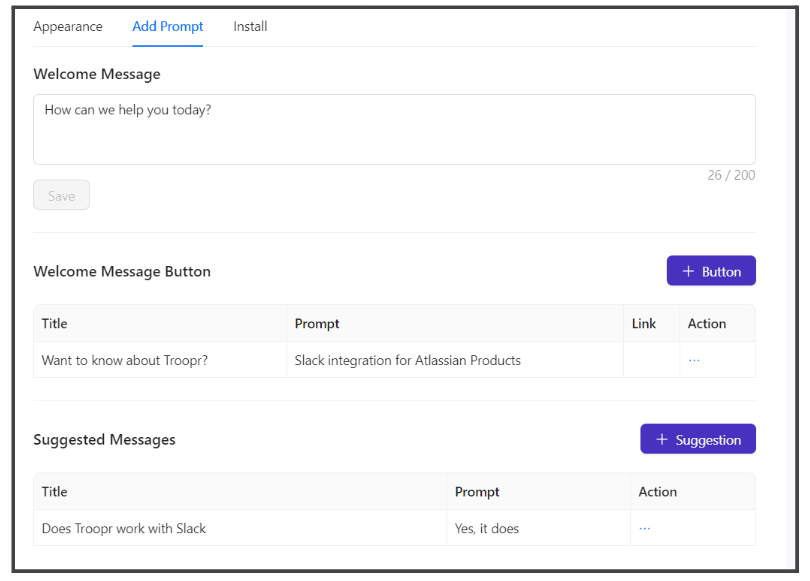
Step 2: Navigate to the "Prompts" tab to add and customize the prompts.
All the changes will be reflected on the test webchat on the right side of the page.
Test it on your website
Go to your website and start asking questions and raising requests.
Your webchat is now deployed and ready to help!